A dictionary without difficult abbreviations
| Concept | What does this mean in practice? |
|---|---|
| Scene | Ready-made image layout: e.g. a game with a camera or a break board. The scene you choose determines what you show. |
| Source | One scene component: game, camera, text, audio, or page with overlay. The order of sources determines what covers what. |
| URL | Full web address. Copy it using the button in the panel; do not copy fragments and do not add spaces. |
| Event | New information from the platform, such as a message, observation or gift. The appearance test is not always an actual event. |
| Resolution | The width × height of the area, e.g. 1920 × 1080. This is different than shrinking the source rectangle with the mouse. |
Step by step · 1–4
- Action
Install OBS from obsproject.com and run the program.
✓ After this step you will seeYou see the preview area and the Scenes, Sources, and Audio Mixer panels.
- Action
If the automatic configuration wizard appears, select a destination that matches your planned transmission.
✓ After this step you will seeThe program suggests output settings that you can still change later.
- Action
In the Scenes panel, click the plus and type Game Test.
✓ After this step you will seeThere is one custom scene on the list.
- Action
Launch the game you want to show and go back to OBS.
✓ After this step you will seeThe game runs in the background and may appear in the windows list.
 Enlarge the screenshot ↗
Step by step · 5–8
- Action
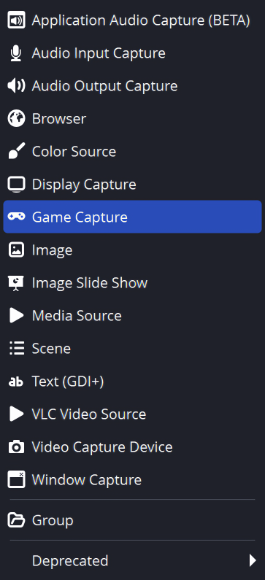
In Sources, click the plus and select Game Capture.
✓ After this step you will seeA source is created that is responsible only for the game image.
- Action
Select the correct game mode and window and confirm.
✓ After this step you will seeThe preview shows the game, not a black rectangle.
- Action
Select the source and fit it to the scene area from the Transform menu.
✓ After this step you will seeThe image fits in the preview without being accidentally cropped.
- Action
If you want a camera, click the plus in Sources and select Video Capture Device.
✓ After this step you will seeThe camera list opens.
 Enlarge the screenshot ↗
Step by step · 9–12
- Action
Select your camera and confirm.
✓ After this step you will seeIn the preview you see the actual camera image.
- Action
In the Sources list, move the camera over the game and zoom out around a corner.
✓ After this step you will seeThe camera is visible, but does not cover the entire game.
- Action
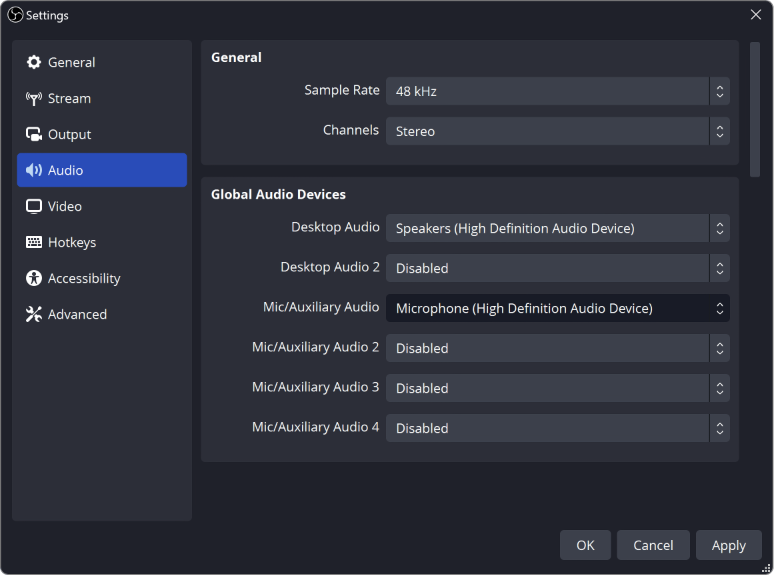
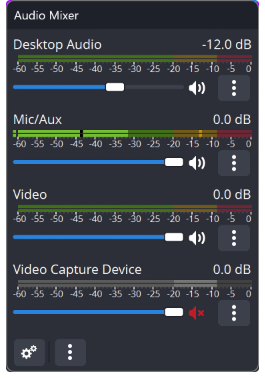
In Settings → Sound, select the appropriate microphone or add it separately as an audio input source.
✓ After this step you will seeThe microphone meter responds to your voice.
- Action
Disable the second copy of the same microphone if you added it using two methods.
✓ After this step you will seeOne voice moves one right track.
 Enlarge the screenshot ↗
Step by step · 13–16
- Action
Speak normally for 10 seconds and reduce the gain if the meter consistently reaches the end.
✓ After this step you will seeThe signal has headroom instead of constantly clipping.
- Action
Set the recording location to a disk with free space.
✓ After this step you will seeYou know where you can find the sample file.
- Action
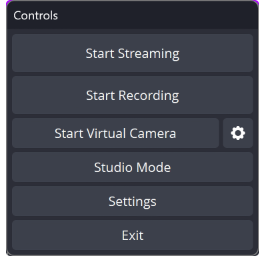
Click Start Recording, say a few sentences and move around in the game.
✓ After this step you will seeA short trial without publication LIVE is created.
- Action
Stop recording and open the saved file.
✓ After this step you will seeYou check the finished image and sound, not just the indicators.
 Enlarge the screenshot ↗
Step by step · 17–18
- Action
If the result is correct, connect the platform in Settings → Stream according to the separate guide.
✓ After this step you will seeYou have set your target channel.
- Action
Only when you are ready, start the broadcast and preview it on the platform.
✓ After this step you will seeYou confirm the public result.
Scene and source: two concepts that will make the entire setup easier
A scene is a ready-made image arrangement. A source is one component of this system: a game, a camera, text, or a web overlay. You change the scene to show a different set of elements; you move the source to change the position of a specific element. The source higher in the list covers the source below it.
Don't add a full screen capture just because it's easiest. It can show private notifications and other windows. If you want to show one game, start by capturing that game. Window capture is more suitable for a regular program.
Why the recording is more important than the preview itself
The preview confirms the image but does not guarantee correct audio output. The meter may respond even though the source has not been assigned to the track being recorded. Playing the file detects no sound, echo, too loud play and clipped elements.
Change one thing at a time. If the camera is dark, correct the camera; do not change the bitrate and microphone at the same time. After a successful attempt, lock the sources with a padlock. This protects the system from accidental stalling.
An example you can reproduce
Beginner test: one game, camera in the corner and one microphone. Record 30 seconds: 10 seconds of talking, 10 seconds of in-game movement, and 10 seconds of both. If you hear echoes, correct the cause before adding music and alerts. You don't have to start with a scene containing a dozen sources.
What do you see on the screen and how to fix it
Fix one thing at a time and try the same thing again. If you change several options at the same time, it will be difficult to determine what solved the problem. Don't delete a working source or entire configuration just because one widget isn't responding.
If you still need help, write down the program name and version, platform, approximate time of trial, expected result, and what actually happened. Attach a dump without passwords, keys and full private links. This description is much more useful than just the "not working" message.
| Symptom | Check first | Do it |
|---|---|---|
| Black game image | Wrong window or capture restriction | Open the black screen guide and check your selected source first. |
| There is no voice | Different microphone selected or no track | Check the microphone meter and local sample file. |
| The voice is double | Two copies of the input or listening back to the recording | Leave one microphone and use headphones. |
| The game covers the camera | Order of sources | Move the camera higher in the list. |
| The recording cuts out | Rendering or encoding overload | View OBS stats and liquidity guide. |
| You don't know where the file is | Different recording path | Check Settings → Output → Recording. |
Last attempt before use on LIVE
- Save the changes using the button assigned to the edited function. If there are separate forms, check each changed part separately.
- Open the settings again and compare the most important values. Simply moving the slider does not always mean a permanent save.
- Check the result outside the editor itself: on the target scene, in the recording, or in the reopened configuration.
- If the function uses the platform, separately acknowledge the new handled event during the active LIVE. Don't expect the appearance test to confirm account authorization.
- Save the working values and make a copy before the next major change. Next time you start up, start with a quick check.
Before you go live
- You know what the fields and units you use mean.
- The most important values were saved and checked again.
- The attempt was graded on the finished output, not just in the editor.
- The image is clear and each sound plays only once.
- Working configuration and safe copy preserved.
Frequently asked questions
Black game image - what to do?
Wrong window or capture restriction. Open the black screen guide and check your selected source first.
No voice - what to do?
Different microphone selected or no track. Check the microphone meter and local sample file.
The voice is double - what to do?
Two copies of the input or listening back to the recording. Leave one microphone and use headphones.
The game covers the camera - what to do?
Order of sources. Move the camera higher in the list.