

A dictionary without difficult abbreviations
| Concept | What does this mean in practice? |
|---|---|
| Mixer | List of audio tracks with meters and sliders. Helps determine which app or device is actually making the sound. |
| Audio track | Selected set of sounds saved or sent to output. A file may contain several tracks that play separately. |
| Source | One scene component: game, camera, text, audio, or page with overlay. The order of sources determines what covers what. |
| Event | New information from the platform, such as a message, observation or gift. The appearance test is not always an actual event. |
| URL | Full web address. Copy it using the button in the panel; do not copy fragments and do not add spaces. |
Step by step · 1–4
- Action
Put on your headphones and mute the LIVE public preview.
✓ After this step you will seeSound from the speakers does not return to the microphone.
- Action
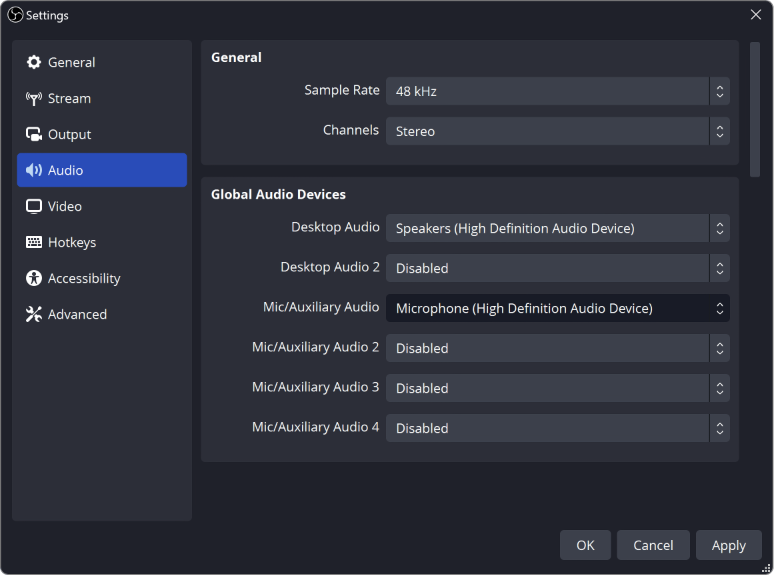
Select the correct microphone in the OBS and disable its second copy.
✓ After this step you will seeYou have one vocal track.
- Action
Place the microphone close to your mouth, slightly to the side, and maintain a similar distance.
✓ After this step you will seeThe volume doesn't change dramatically with each sentence.
- Action
Without filters, record silence, normal voice and louder sentences.
✓ After this step you will seeYou have a reference point.
 Enlarge the screenshot ↗
Step by step · 5–8
- Action
Reduce the input gain if the voice is already clipping before the filters.
✓ After this step you will seeThe raw recording does not crackle when speaking loudly.
- Action
Next to the microphone source, open Filters.
✓ After this step you will seeYou add processing to the correct source.
- Action
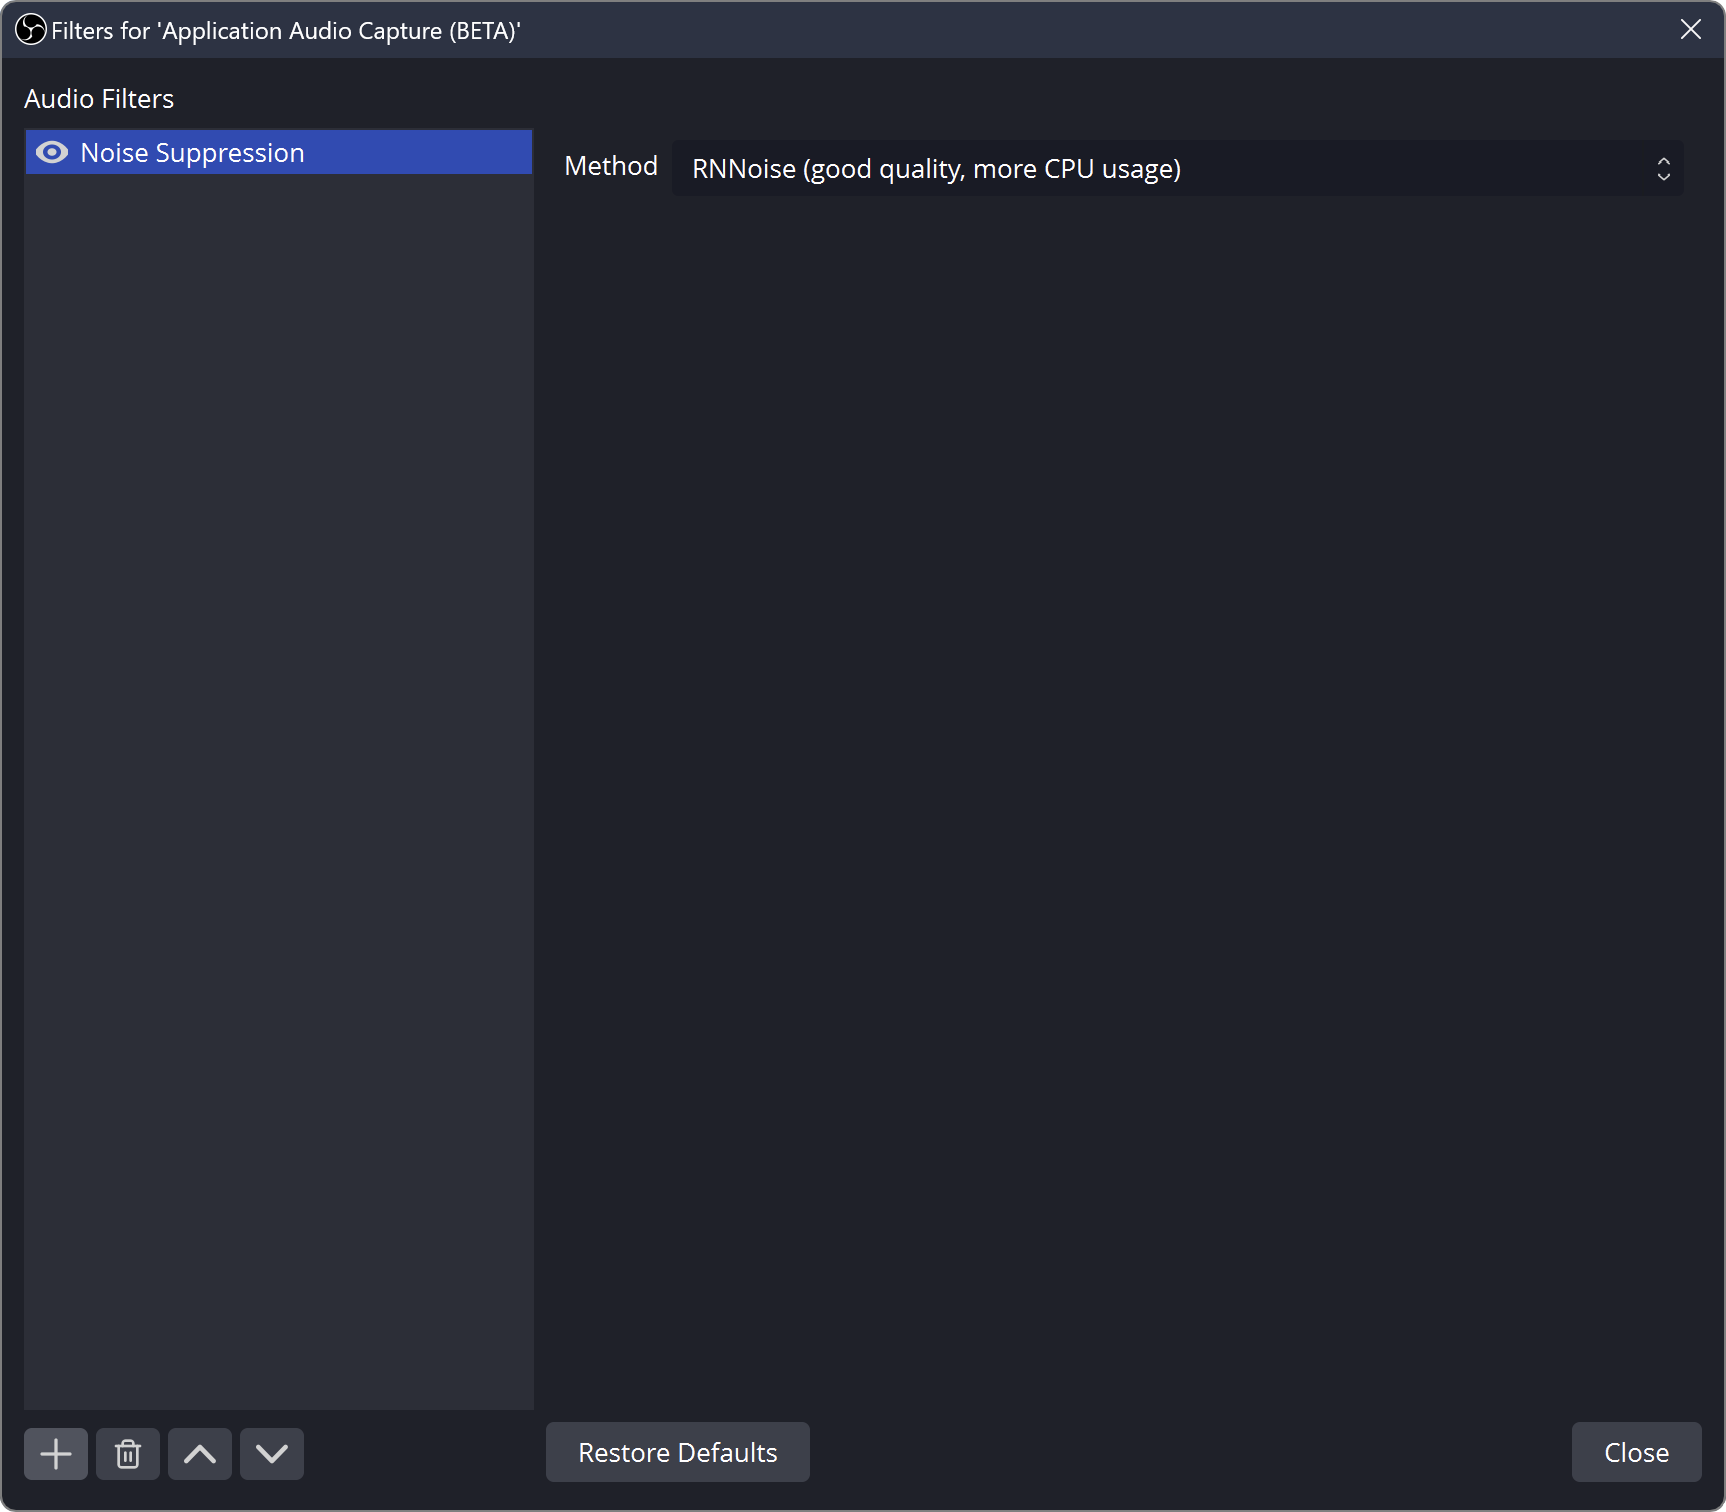
Add Noise Suppression and select an available method appropriate to your hardware.
✓ After this step you will seeThe monotonous hum may decrease, but the voice still sounds natural.
- Action
Compare the recording with and without the filter.
✓ After this step you will seeYou know, doesn't improvement cost comprehensibility?
 Enlarge the screenshot ↗
Step by step · 9–12
- Action
If you use a gate or expander, set it so that it does not truncate silent beginnings and ends of sentences.
✓ After this step you will seeThe words remain complete.
- Action
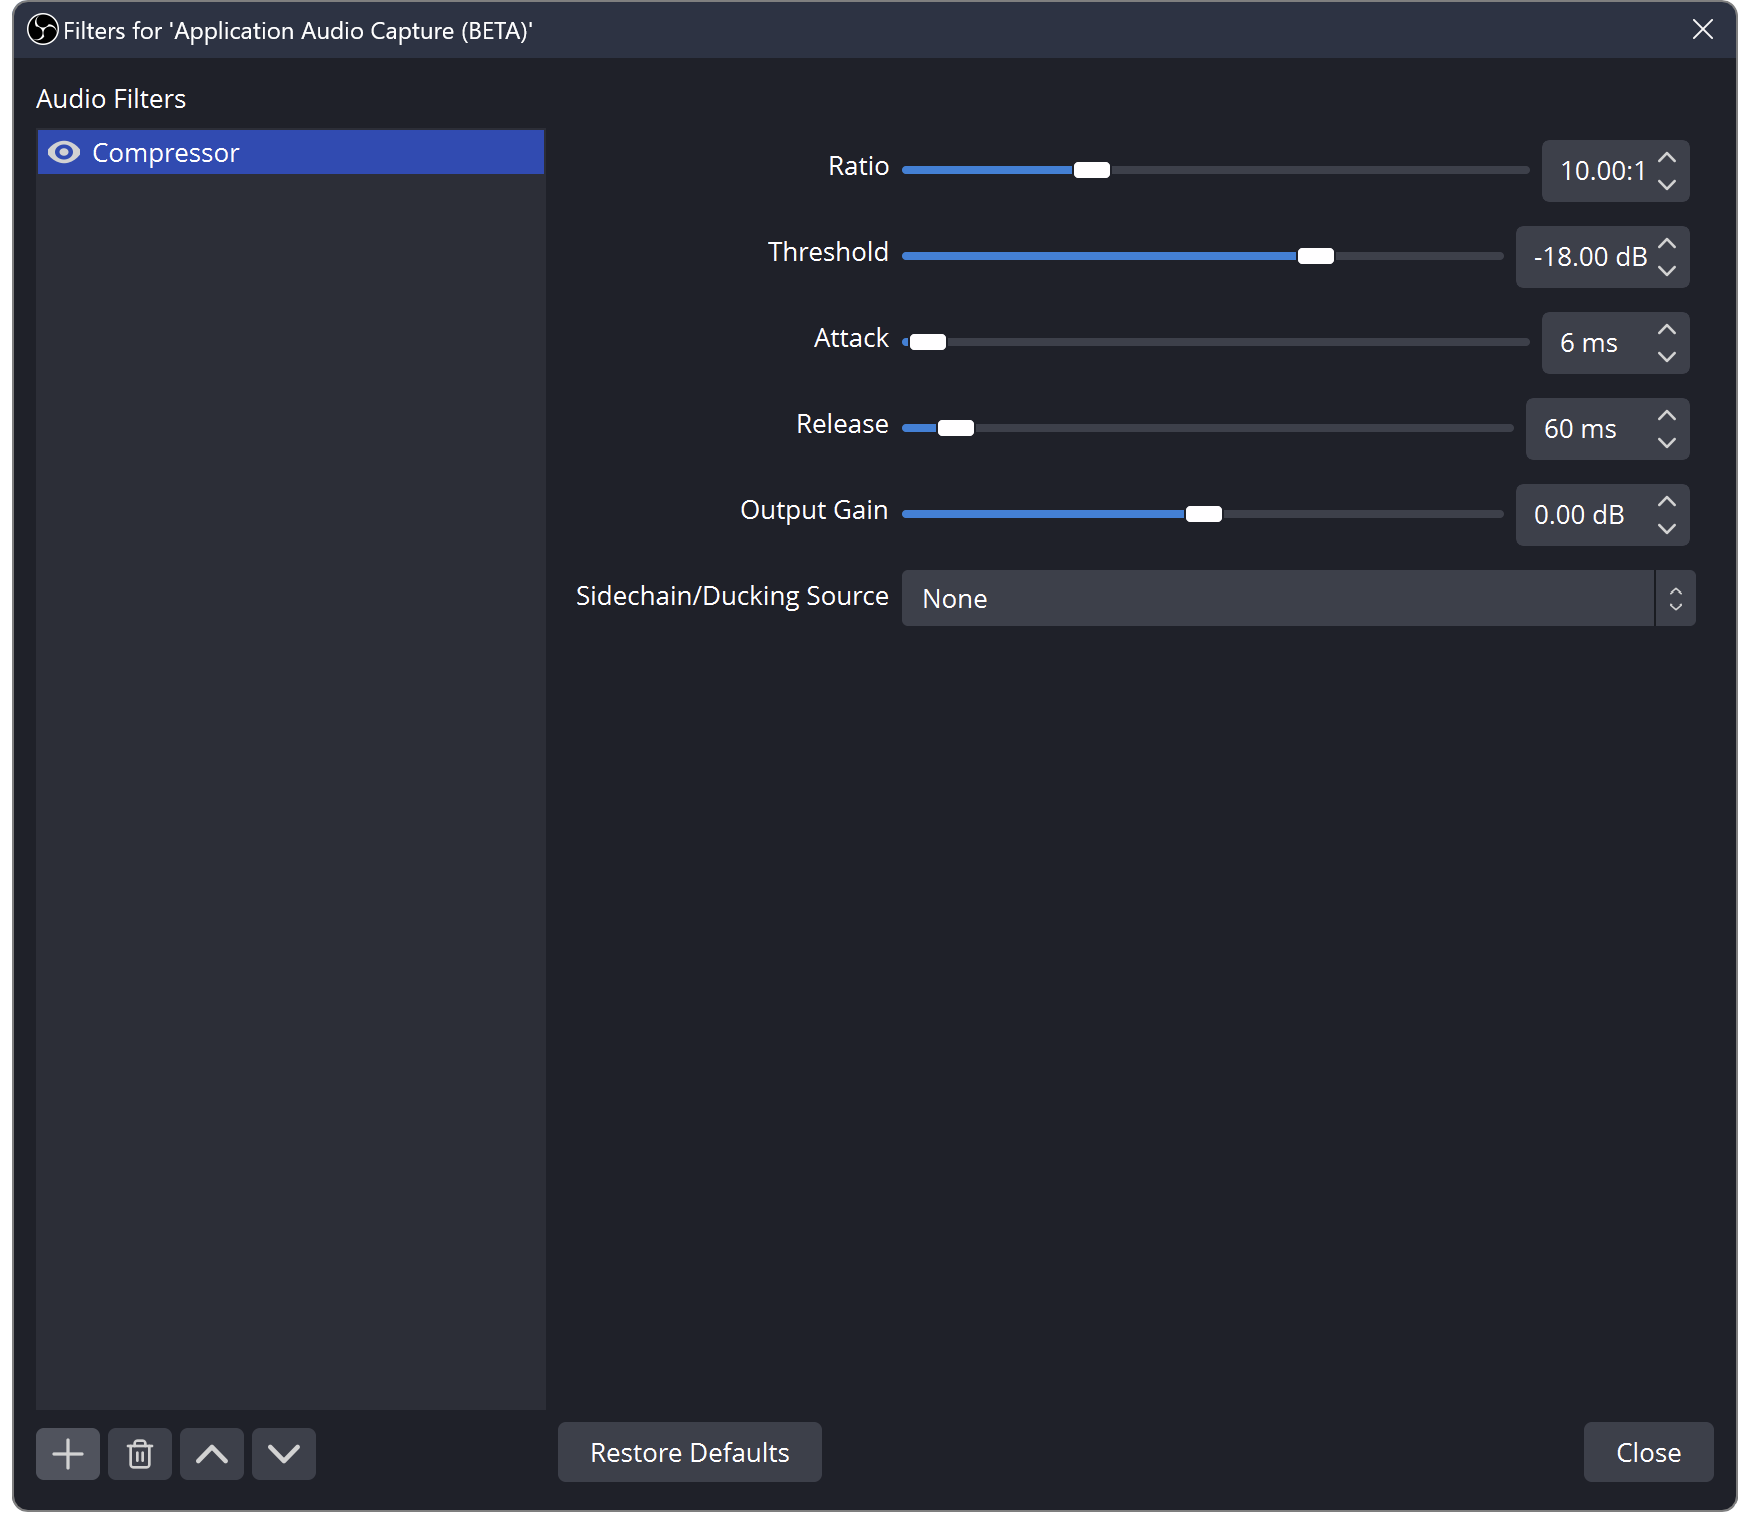
Add a compressor and start gently.
✓ After this step you will seeLouder parts are evened out without pumping up the entire background.
- Action
Speak softly, normally and loudly when checking the compressor.
✓ After this step you will seeThe filter does not turn all breaths into loud sounds.
- Action
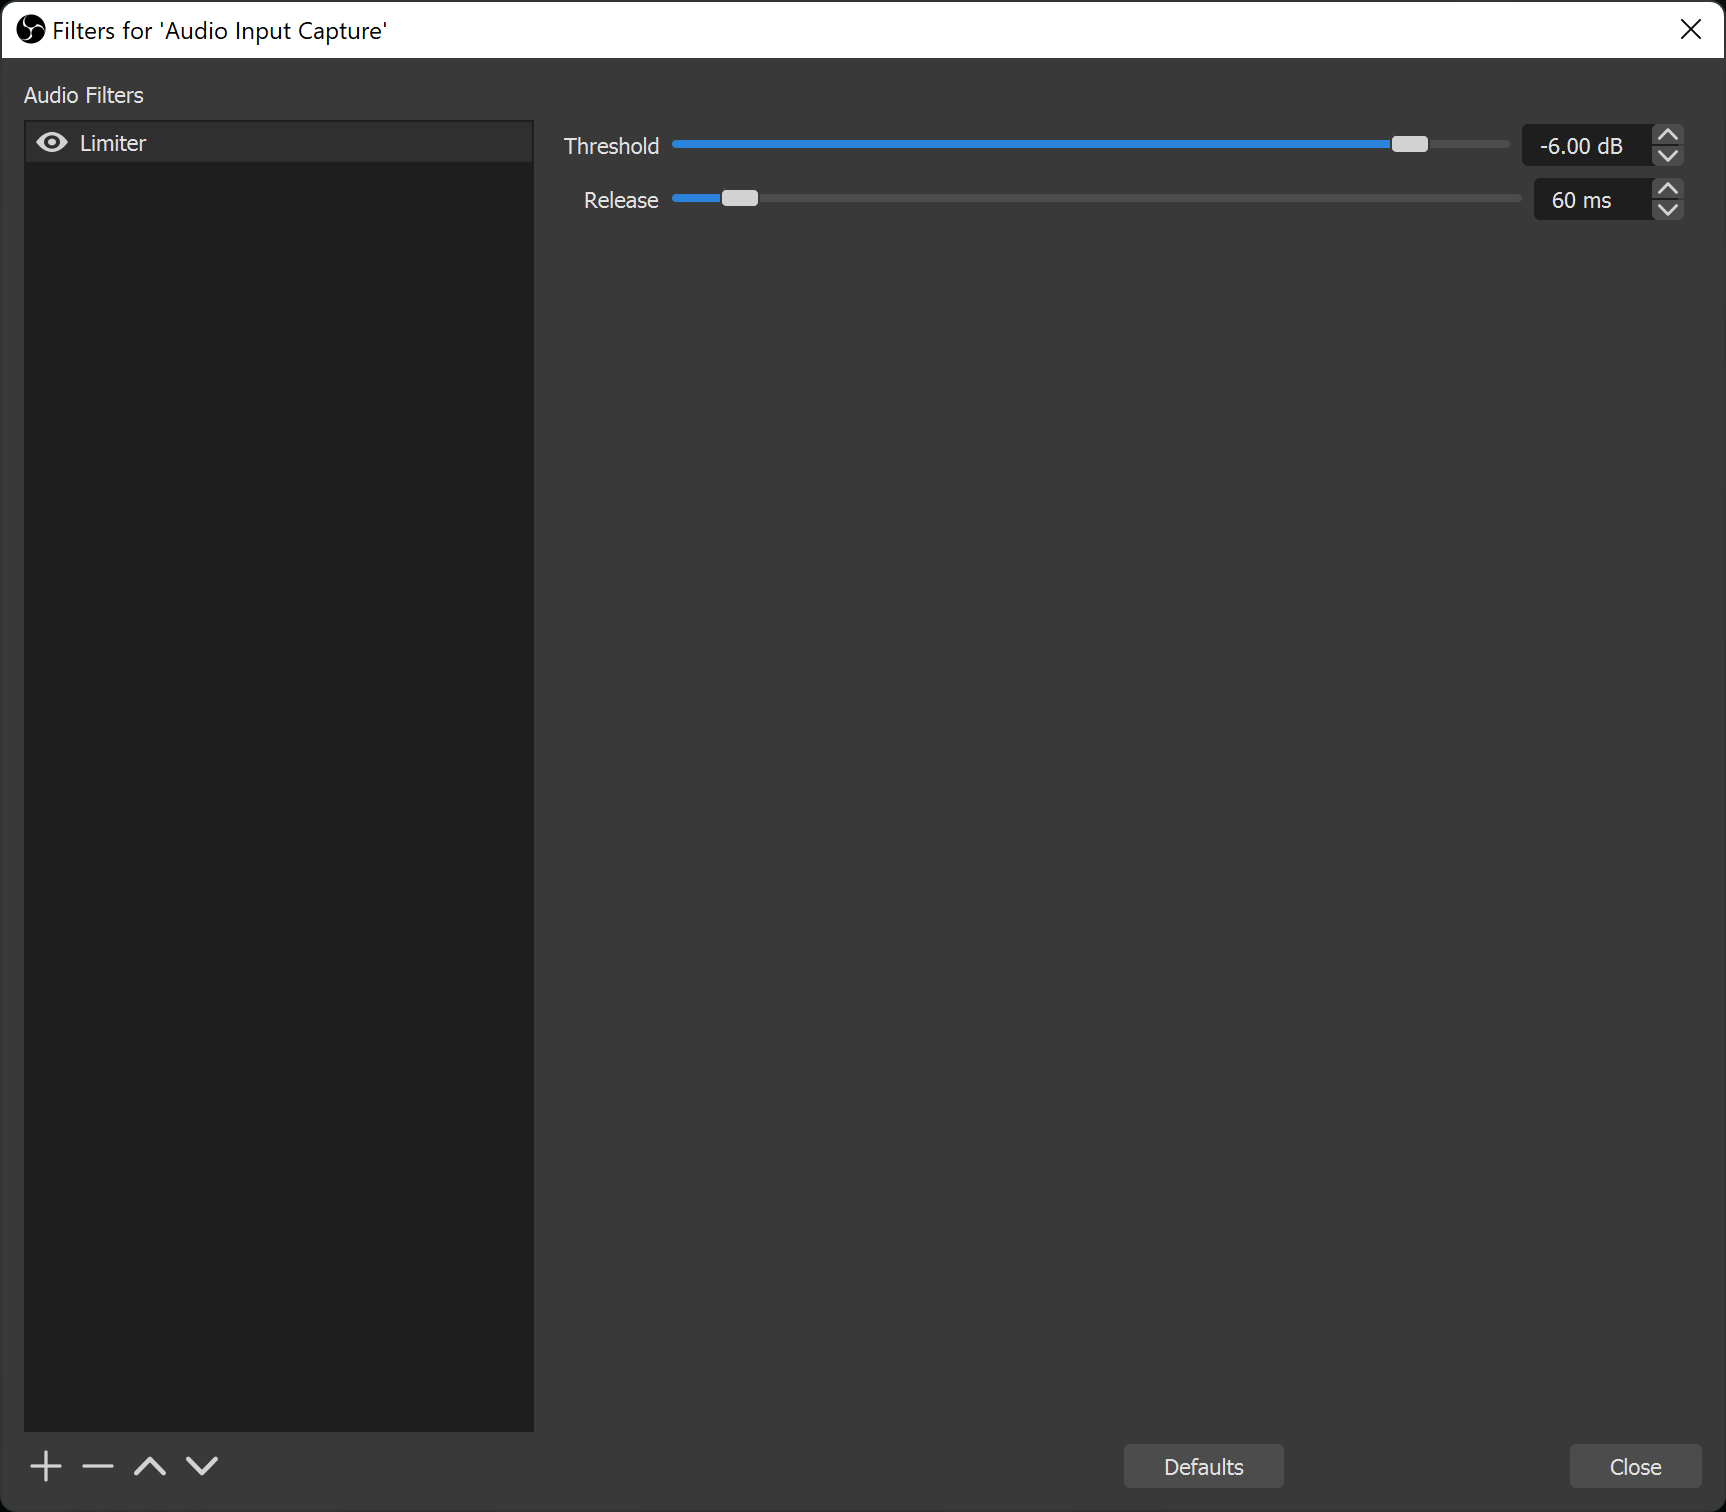
Add a limiter at the end of the filter order.
✓ After this step you will seeThe last filter limits the signal peaks.
 Enlarge the screenshot ↗
Step by step · 13–16
- Action
To test, set the limit slightly below 0 dB, e.g. −1 dB, and check the recording.
✓ After this step you will seeThe output has a small headroom, but does not repair the damaged input.
- Action
Record 30 seconds of gameplay and speech.
✓ After this step you will seeYou can evaluate the voice in a real mix.
- Action
Turn down your game or music if it's covering the words.
✓ After this step you will seeYou don't make up for every problem by picking up the mic.
- Action
Save the working values and return to the usual distance from the microphone.
✓ After this step you will seeYou start the next LIVE with a proven setting.
 Enlarge the screenshot ↗
The filter will not replace the correct input signal
First, move the microphone away from the keyboard and fan, limit the room reverberation, and set the gain to a reasonable level. Filters work better on a clear voice than on a quiet voice recorded from across the desk. The distortion created in the input device cannot be removed later with the OBS slider.
Noise suppression is best at dealing with specific types of noise. Strong settings can distort speech, music and laughter. RNNoise and Speex have different behavior and overhead. Confirm your selection by listening to your own microphone.
The compressor, limiter and gate do different things
The compressor reduces the difference between louder and quieter parts once the threshold is exceeded. The limiter limits the highest peaks and should be the last in the chain. The gate mutes the signal below the threshold, so if set incorrectly it can cut off words.
Don't immediately raise the compressor's output volume. You will also increase your breathing and other background. Evaluate the settings together with the game and music, not just with a single sentence in silence. Remember to use the same listening volume when comparing samples.
An example you can reproduce
Recording A: 5 seconds of silence and the phrase "Hi, I'm testing the microphone." Recording B: same conditions after one filter. If the background is quieter but the ends of the words disappear, lower the intensity or loosen the gate. The example −1 dB limiter is a starting point, not a universal recipe for all devices.
What do you see on the screen and how to fix it
Fix one thing at a time and try the same thing again. If you change several options at the same time, it will be difficult to determine what solved the problem. Don't delete a working source or entire configuration just because one widget isn't responding.
If you still need help, write down the program name and version, platform, approximate time of trial, expected result, and what actually happened. Attach a dump without passwords, keys and full private links. This description is much more useful than just the "not working" message.
| Symptom | Check first | Do it |
|---|---|---|
| The beginnings of words disappear | Gate or damping too strong | Loosen the threshold and compare the raw recording. |
| The voice sounds metallic | Denoising too strong | Reduce the intensity or compare another method. |
| Cracking noise when screaming | Input clipping | Lower the device gain before the filters. |
| The background grows after each sentence | Too much compression or gain | Reduce the filter effect and its output gain. |
| You hear yourself with a delay | Listening returns from the program or LIVE | Disable unnecessary monitoring, leaving the correct output. |
| The meter works, the file is silent | The source does not appear on the recording track | Check Advanced Sound Properties. |
Last attempt before use on LIVE
- Save the changes using the button assigned to the edited function. If there are separate forms, check each changed part separately.
- Open the settings again and compare the most important values. Simply moving the slider does not always mean a permanent save.
- Check the result outside the editor itself: on the target scene, in the recording, or in the reopened configuration.
- If the function uses the platform, separately acknowledge the new handled event during the active LIVE. Don't expect the appearance test to confirm account authorization.
- Save the working values and make a copy before the next major change. Next time you start up, start with a quick check.
Before you go live
- You know what the fields and units you use mean.
- The most important values were saved and checked again.
- The attempt was graded on the finished output, not just in the editor.
- The image is clear and each sound plays only once.
- Working configuration and safe copy preserved.
Frequently asked questions
The beginnings of words are disappearing - what to do?
Gate or damping too strong. Loosen the threshold and compare the raw recording.
The voice sounds metallic - what should I do?
Denoising too strong. Reduce the intensity or compare another method.
Cracking noise when screaming - what to do?
Input clipping. Lower the device gain before the filters.
The background grows after each sentence - what to do?
Too much compression or gain. Reduce the filter effect and its output gain.