
Prepare before you start
Follow the numbered actions in order and compare your screen or recording with each expected result. Menu names can differ between application versions. Arrows show the order of settings and choices, not a claim that every account offers the same controls.
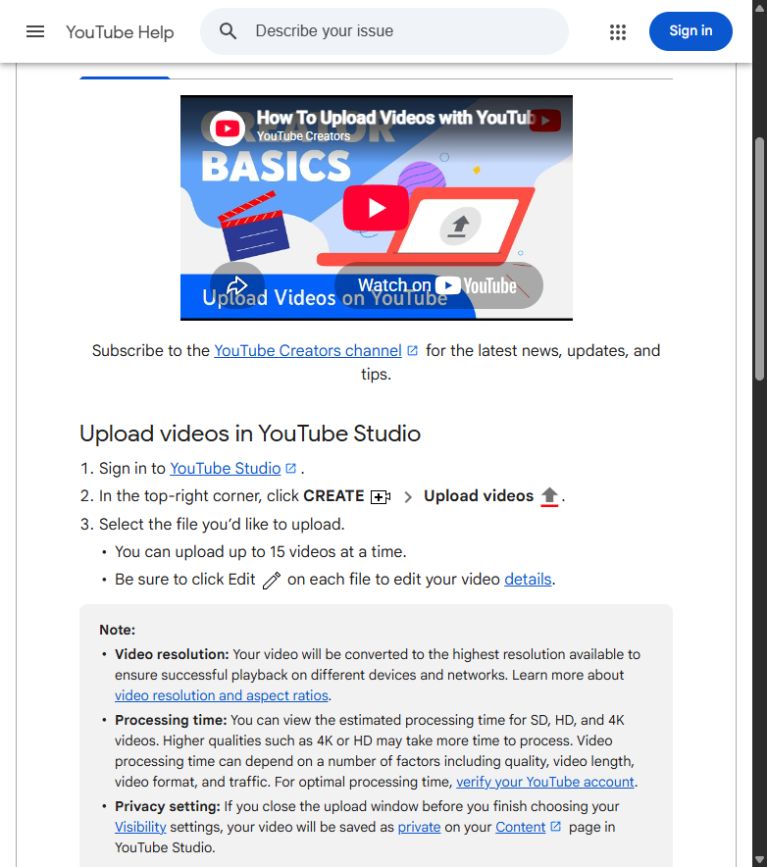
Step by step · 1–4
- Action
Open: Upload video → YouTube Studio → +.
✓ After this step you will seeAfter this step you will see: YouTube Studio → Account.
- Action
Select or set: File → File ✓.
✓ After this step you will seeAfter this step you will see: Usage rights + File.
- Action
Write down: Title → Promise.
✓ After this step you will seeAfter this step you will see: Title = Promise.
- Action
Write down: Description → Description + Sources and licenses.
✓ After this step you will seeAfter this step you will see: Sources and licenses.
 Enlarge the screenshot ↗
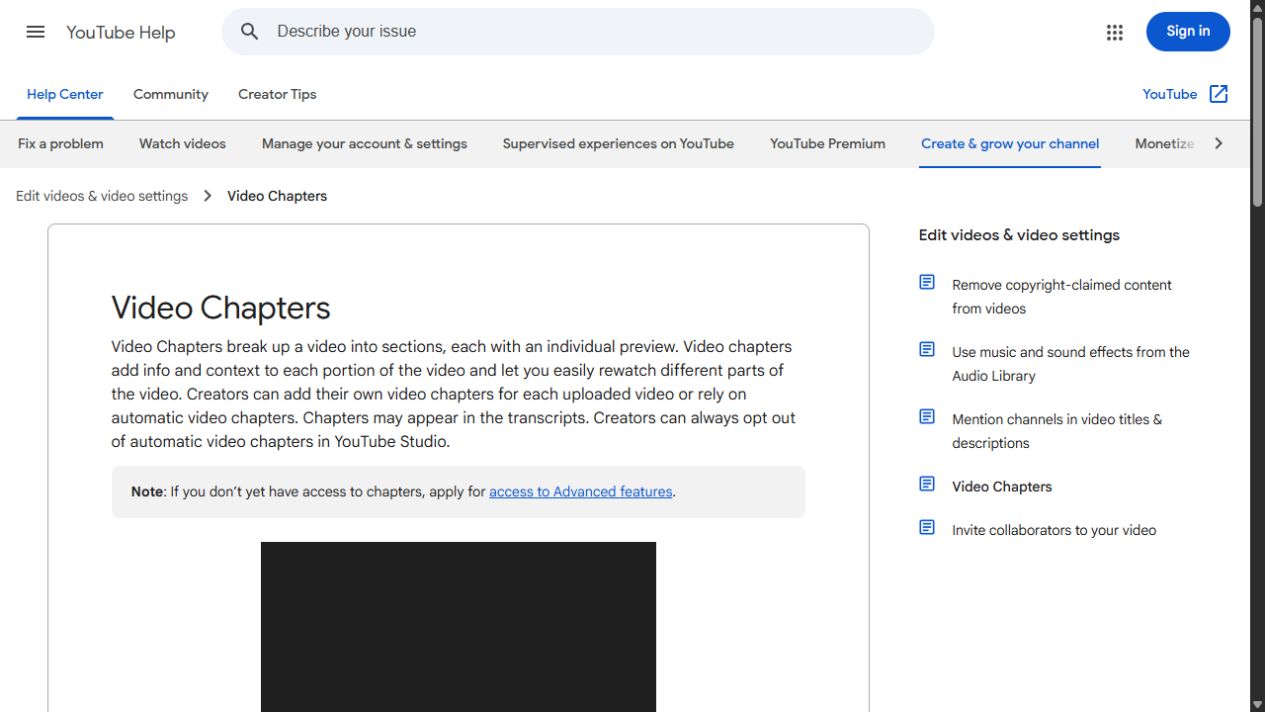
Step by step · 5–8
- Action
Select or set: Audience → Audience ✓.
✓ After this step you will seeAfter this step you will see: Audience ✓.
- Action
Select or set: Language → Language ✓.
✓ After this step you will seeAfter this step you will see: Subtitles.
- Action
Write down: Subtitles → Correct names.
✓ After this step you will seeAfter this step you will see: Readability.
- Action
Write down: Chapters → 00:00 / 3+ / 10 s+.
✓ After this step you will seeAfter this step you will see: 00:00 · 3+ · 10 s+.
 Enlarge the screenshot ↗
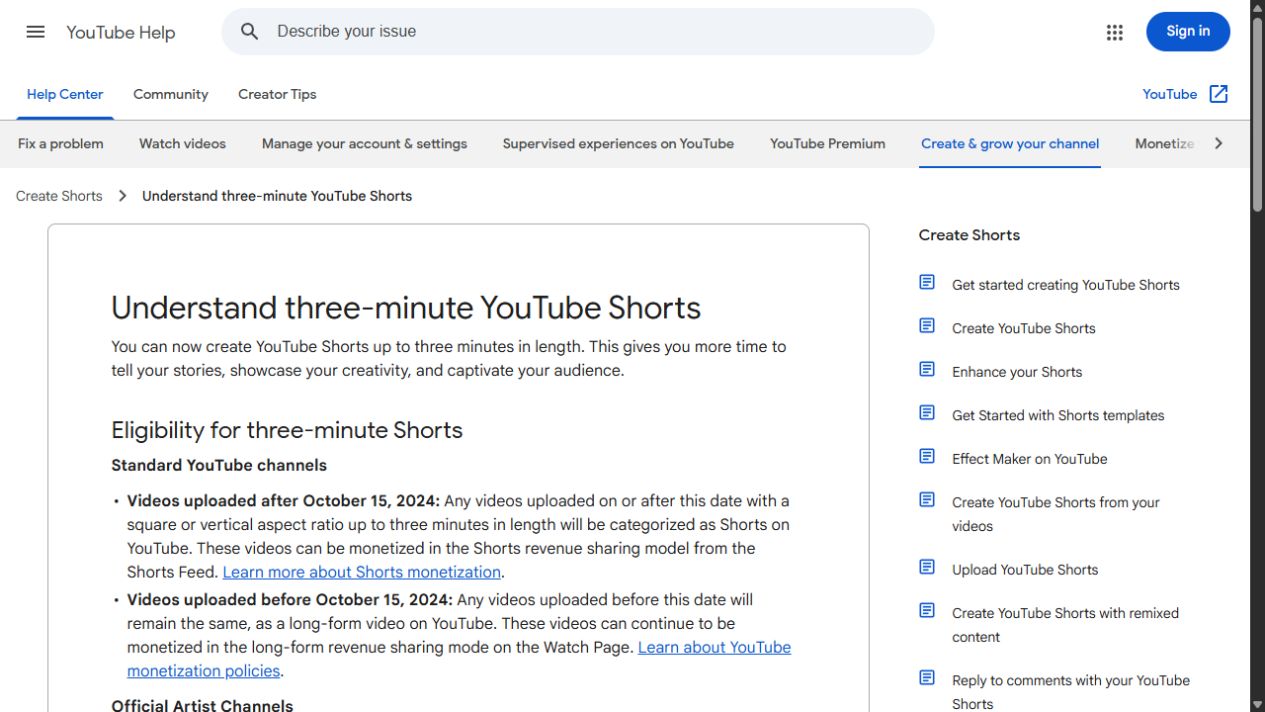
Step by step · 9–12
- Action
Check: Usage rights → Usage rights + File.
✓ After this step you will seeAfter this step you will see: Usage rights.
- Action
Select or set: Visibility → Private.
✓ After this step you will seeAfter this step you will see: Private.
- Action
Test: Preview → Phone application · 100%.
✓ After this step you will seeAfter this step you will see: Viewer output.
- Action
Select or set: Visibility → Public / Scheduled publication.
✓ After this step you will seeAfter this step you will see: Public.
 Enlarge the screenshot ↗
Settings · Context
| Action | After this step you will see | Context |
|---|---|---|
| Visibility | Private | Short test |
| Subtitles | Language ✓ | Correct names |
| Chapters | 00:00 / 3+ / 10 s+ | 00:00 · 3+ · 10 s+ |
| Scheduled publication | Public / Scheduled publication | Public |
Quick setup · Short test
For a video over two minutes, an example chapter list is 00:00 problem, 00:25 settings, 01:20 test. Play the export and verify those actual moments after editing. Read subtitles as complete sentences; individually plausible words can still be wrong in context.
In Studio, use Create, choose Upload videos and select the final export. Before public or scheduled publication, check the channel, audience, language, thumbnail and rights checks. A completed upload does not always mean the highest-resolution processing has finished.
- Write down: Title → Promise.
- Select or set: Language → Language ✓.
- Check: Usage rights → Usage rights + File.
- Select or set: Visibility → Public / Scheduled publication.
Before you go live
Keep your existing configuration and original source file first. Change one parameter at a time. Check a short recording or the actual viewer output, rather than relying only on the editor. Restore the recorded baseline if the result gets worse.
- One change at a time → Baseline.
- Viewer output → Short test.
- Results → Backup.
Before you go live
- Baseline ✓
- Usage rights ✓
- Viewer output ✓
- Backup ✓
- One change at a time ✓
Frequently asked questions
Prepare before you start?
Account / Source files. Baseline → Backup. Short test → Viewer output. Open: Upload video → YouTube Studio → +.
Stop and check?
After this step you will see: Public. Keep your existing configuration and original source file first. Change one parameter at a time. Check a short recording or the actual viewer output, rather than relying only on the editor. Restore the recorded baseline if the result gets worse.
Context?
Upload privately first and wait for processing and checks. Correct automatic subtitles. Manual chapters start at 00:00, need at least three ascending timestamps and must each last ten seconds or more. Account feature access also matters.