

Prepare before you start
Follow the numbered actions in order and compare your screen or recording with each expected result. Menu names can differ between application versions. Arrows show the order of settings and choices, not a claim that every account offers the same controls.
A dictionary without difficult abbreviations
| Name | After this step you will see |
|---|---|
| Framing | 9:16 → 1080 × 1920 px; 16:9 → 1920 × 1080 px |
| FPS | 30 FPS = 30 × frames / 1 s |
| Mb/s · MB/s | 1 Mb/s = 1000 kb/s; 1 MB/s = 8 Mb/s |
Step by step · 1–4
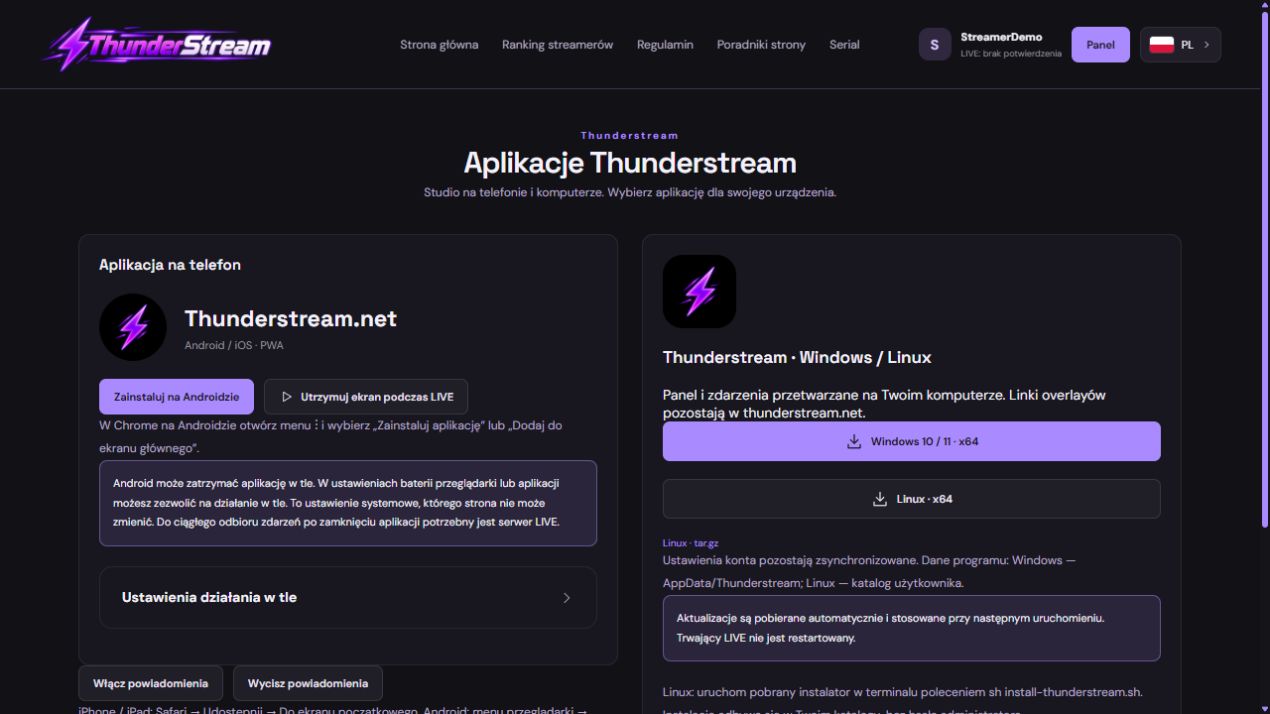
- Action
Open: Thunderstream applications → https://thunderstream.net/applications.
✓ After this step you will seeAfter this step you will see: https://thunderstream.net.
- Action
Select or set: Account → Thunderstream → Account.
✓ After this step you will seeAfter this step you will see: Thunderstream → Account.
- Action
Open: Program updates → Check for updates.
✓ After this step you will seeAfter this step you will see: Version.
- Action
Select or set: Platform → TikTok / YouTube / Twitch / Kick.
✓ After this step you will seeAfter this step you will see: Account → Platform.
 Enlarge the screenshot ↗
Step by step · 5–8
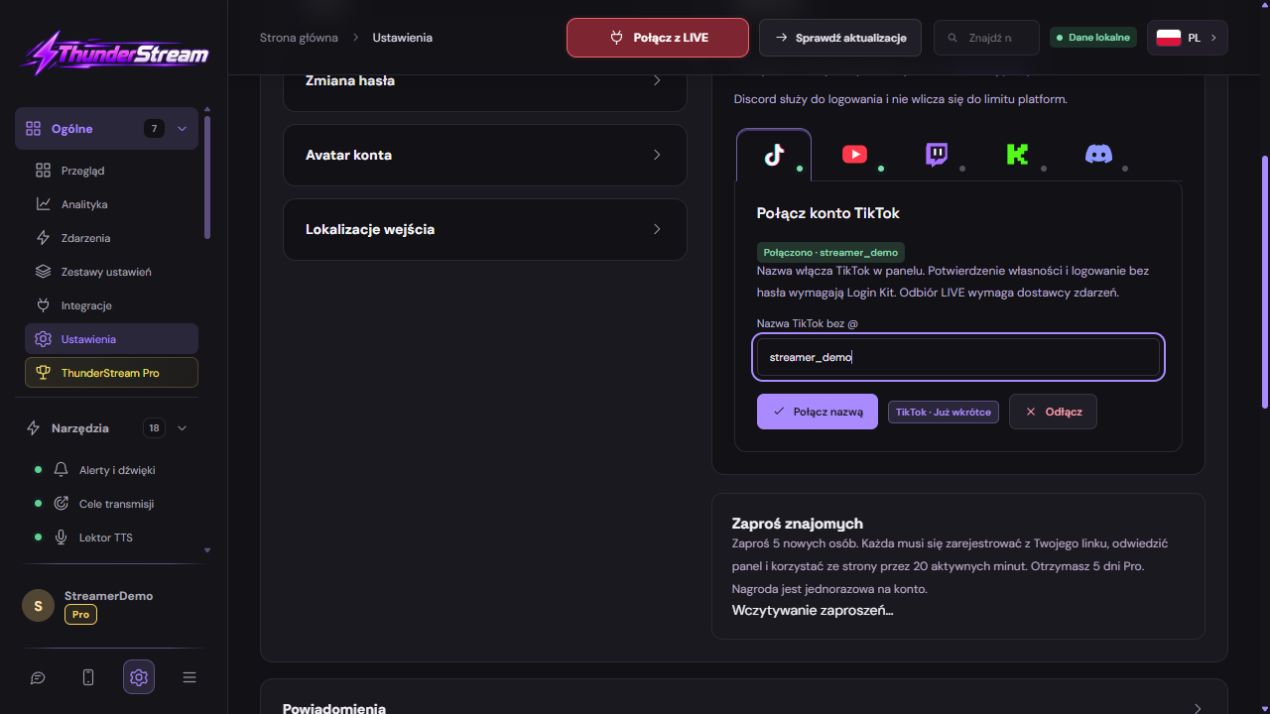
- Action
Check: LIVE → Connected.
✓ After this step you will seeAfter this step you will see: Statistics ✓.
- Action
Select or set: Overlays → 1 × Overlays.
✓ After this step you will seeAfter this step you will see: OBS / LIVE Studio → Overlays.
- Action
Save: Settings → 1 × Overlays.
✓ After this step you will seeAfter this step you will see: Changes saved..
- Action
Copy: Overlays URL → Overlays → URL.
✓ After this step you will seeAfter this step you will see: Privacy ✓.
 Enlarge the screenshot ↗
Step by step · 9–12
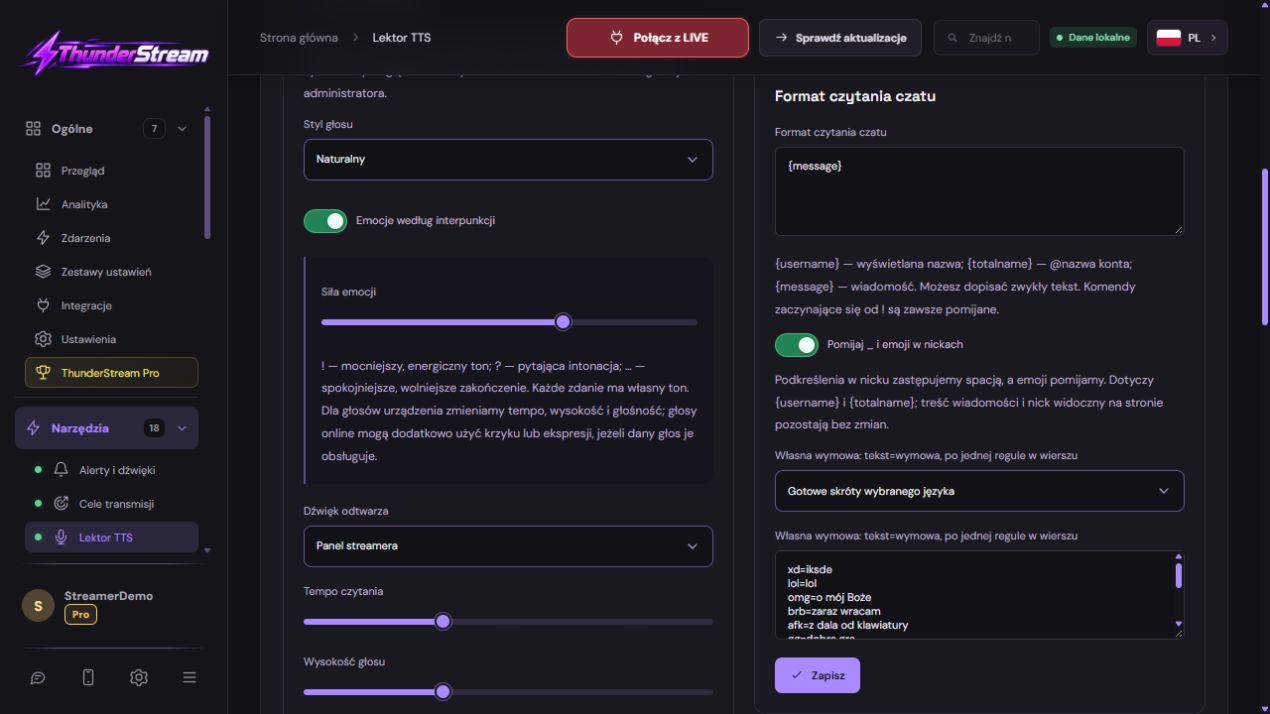
- Action
Select or set: Framing (px) → 1920 × 1080.
✓ After this step you will seeAfter this step you will see: 1920 × 1080 = 1920 × 1080.
- Action
Select or set: Audio → 1 × Audio.
✓ After this step you will seeAfter this step you will see: Audio ×2 → ×1.
- Action
Test: Recording → 60 s.
✓ After this step you will seeAfter this step you will see: Viewer output.
- Action
Check: Analytics → Statistics ✓.
✓ After this step you will seeAfter this step you will see: Statistics ✓.
 Enlarge the screenshot ↗
Settings · Context
| Action | After this step you will see | Context |
|---|---|---|
| Platform | Account → Platform | Connected |
| Overlays | thunderstream.net | OBS / LIVE Studio → Overlays |
| Audio | 1 × Audio | Audio ×2 → ×1 |
| Program updates | Version | Short test |
Quick setup · Short test
Start with one tool, such as chat, and save it. Add its private overlay URL to an OBS Browser Source with the saved dimensions. The appearance test confirms graphics. A new real message confirms event reception. Test audio separately with a short recording.
Use your existing website account rather than creating another desktop profile. Enable microphone monitoring with its explicit button. Apply restart-requiring updates outside an important stream. A RAM budget changes application resources, not Pro entitlements or the need for the hosting connection.
- Open: Program updates → Check for updates.
- Select or set: Overlays → 1 × Overlays.
- Select or set: Framing (px) → 1920 × 1080.
- Check: Analytics → Statistics ✓.
Before you go live
Keep your existing configuration and original source file first. Change one parameter at a time. Check a short recording or the actual viewer output, rather than relying only on the editor. Restore the recorded baseline if the result gets worse.
- One change at a time → Baseline.
- Viewer output → Short test.
- Results → Backup.
Before you go live
- Baseline ✓
- Usage rights ✓
- Viewer output ✓
- Backup ✓
- One change at a time ✓
Frequently asked questions
Prepare before you start?
Account / Source files. Baseline → Backup. Short test → Viewer output. Open: Thunderstream applications → https://thunderstream.net/applications.
Stop and check?
After this step you will see: Statistics ✓. Keep your existing configuration and original source file first. Change one parameter at a time. Check a short recording or the actual viewer output, rather than relying only on the editor. Restore the recorded baseline if the result gets worse.
Context?
A linked account is not proof of an active livestream. Use the same profile, verify a real event and then add more tools. The desktop program handles some work locally; accounts, synchronization and hosted overlays still require the server and internet.