

A dictionary without difficult abbreviations
| Concept | What does this mean in practice? |
|---|---|
| Set of settings | Save supported options for reuse. It does not replace all files, passwords and platform connections. |
| Scene | Ready-made image layout: e.g. a game with a camera or a break board. The scene you choose determines what you show. |
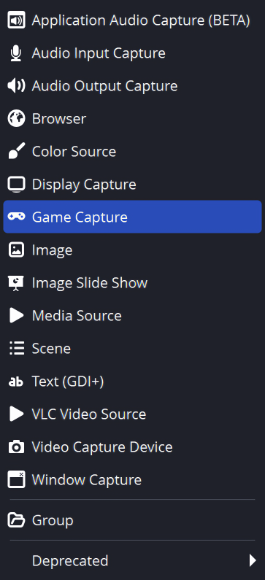
| Source | One scene component: game, camera, text, audio, or page with overlay. The order of sources determines what covers what. |
| URL | Full web address. Copy it using the button in the panel; do not copy fragments and do not add spaces. |
| Resolution | The width × height of the area, e.g. 1920 × 1080. This is different than shrinking the source rectangle with the mouse. |
Step by step · 1–4
- Action
Schedule a backup before a major change or move, preferably outside of the active LIVE.
✓ After this step you will seeYou don't change key settings while transmitting.
- Action
Create a folder with a date, e.g. Studio-2026-10-27.
✓ After this step you will seeThe copies have clear names.
- Action
In OBS, note the name of the active profile and scene collection.
✓ After this step you will seeYou know what you are exporting.
- Action
In the Profile menu, use active profile export.
✓ After this step you will seeYou retain the output and program settings covered by the profile.
 Enlarge the screenshot ↗
Step by step · 5–8
- Action
In the Scene Collection menu, export the appropriate collection.
✓ After this step you will seeYou preserve scenes, sources and their layout.
- Action
Copy your used local images, videos, sounds and text files to an organized folder.
✓ After this step you will seeThe copy does not depend solely on old disk paths.
- Action
Save a list of additional plugins and their versions.
✓ After this step you will seeThe new computer will know what's missing.
- Action
Protect your copy from public access.
✓ After this step you will seeThe export may contain private addresses or other settings.
 Enlarge the screenshot ↗
Step by step · 9–12
- Action
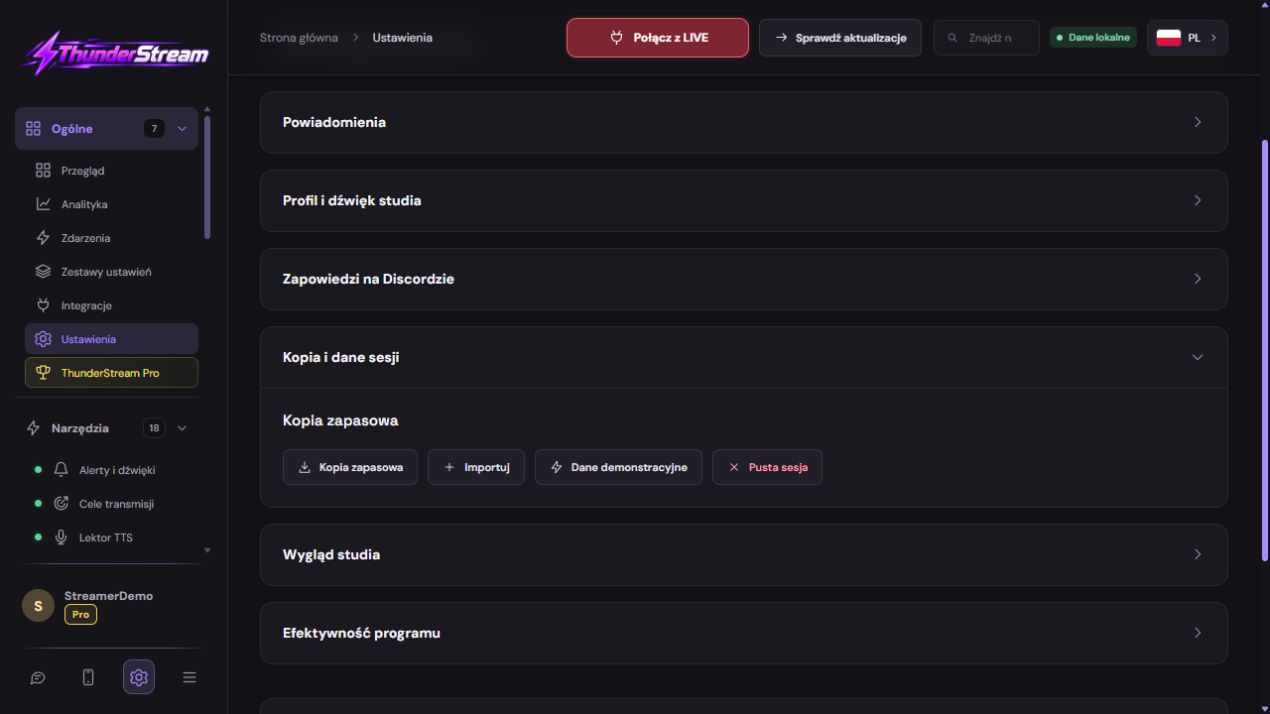
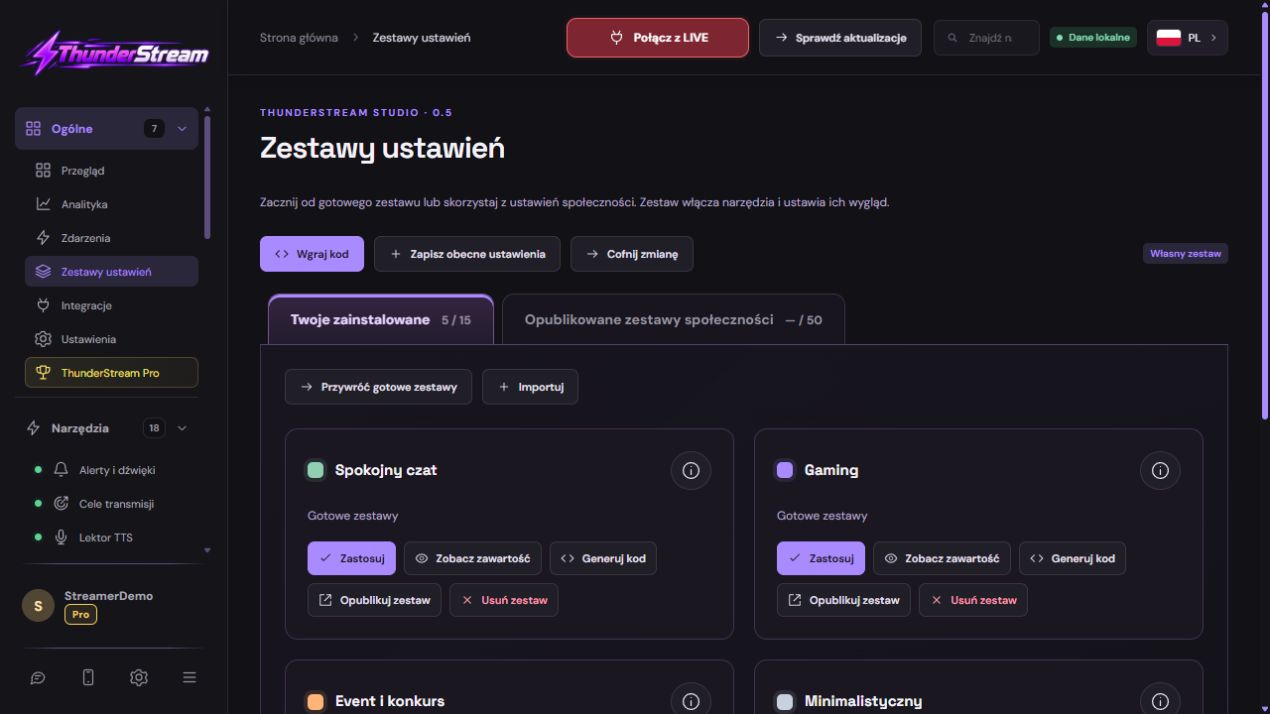
In Thunderstream, save your own set of configurations or use the available export.
✓ After this step you will seePanel settings have a separate copy.
- Action
Write down the names of the materials you need and check whether their addresses will be available after the move.
✓ After this step you will seeA set is not confused with an archive of all files.
- Action
On the second computer, install a compatible version of OBS and the necessary plug-ins from official sources.
✓ After this step you will seeThe program can read the sources used.
- Action
Import the profile and collection with a distinguishable name.
✓ After this step you will seeYou don't immediately overwrite the only working version.
 Enlarge the screenshot ↗
Step by step · 13–16
- Action
Fix paths to missing files and select the correct microphone and camera.
✓ After this step you will seeSources use new computer devices.
- Action
Check browser sources and resolutions without showing private URLs.
✓ After this step you will seeThe overlays work in the correct dimensions.
- Action
Record the picture, sound, cuts and scene changes.
✓ After this step you will seeThe copy is practically checked.
- Action
Keep the old version until you confirm the complete configuration.
✓ After this step you will seeYou can go back to the previous layout.
The profile and scene collection are different parts of the copy
The OBS profile stores a group of program and output settings, but does not replace the scene collection. The collection includes scenes, sources and their arrangement, but is not a complete package of all external files. So you do two exports and keep the media separately.
The file used by the source may be on the desktop, in downloads, or on another drive. If you change your computer, the path may no longer exist. First organize the materials in a permanent directory, then recreate the references. Do not remove the originals before checking the new configuration.
A set of settings is not a copy of your entire account
The Thunderstream kit helps you recreate supported tool settings. It should not be considered a transfer of passwords, platform authorizations or all transferred files. After import, check account connections and material availability. Only publish a set after you have audited its contents.
A copy on the same disk protects against misconfiguration, but not against failure of the entire disk. Keep a second, secure copy. After each important addition to the studio, make a new, dated version and keep at least the last working one.
An example you can reproduce
Just exporting your scene collection does not automatically transfer your entire catalog of videos, all your plug-ins and output settings. A full working copy is profile + collection + media + add-on list + separate service configuration. When moving from Windows to Linux, you must additionally check the sources and paths specific to the system.
What do you see on the screen and how to fix it
Fix one thing at a time and try the same thing again. If you change several options at the same time, it will be difficult to determine what solved the problem. Don't delete a working source or entire configuration just because one widget isn't responding.
If you still need help, write down the program name and version, platform, approximate time of trial, expected result, and what actually happened. Attach a dump without passwords, keys and full private links. This description is much more useful than just the "not working" message.
| Symptom | Check first | Do it |
|---|---|---|
| No images after import | The files were not transferred | Copy media and correct source paths. |
| The scenes are there, but the bitrate is different | Profile not imported | Check both exports separately. |
| There is no source type | A plug-in or system feature is missing | Install a compatible add-on or select a supported equivalent. |
| Microphone not working | The new device has a different name | Select the correct input on your new computer. |
| After importing the set, there is no platform login | Authorization is not part of the public set | Connect your account with the official button. |
| The layout does not fit the new format | Different base resolution | Compare the profile area and overlay dimensions. |
Last attempt before use on LIVE
- Save the changes using the button assigned to the edited function. If there are separate forms, check each changed part separately.
- Open the settings again and compare the most important values. Simply moving the slider does not always mean a permanent save.
- Check the result outside the editor itself: on the target scene, in the recording, or in the reopened configuration.
- If the function uses the platform, separately acknowledge the new handled event during the active LIVE. Don't expect the appearance test to confirm account authorization.
- Save the working values and make a copy before the next major change. Next time you start up, start with a quick check.
Before you go live
- You know what the fields and units you use mean.
- The most important values were saved and checked again.
- The attempt was graded on the finished output, not just in the editor.
- The image is clear and each sound plays only once.
- Working configuration and safe copy preserved.
Frequently asked questions
No images after import - what to do?
The files were not transferred. Copy media and correct source paths.
The scenes are there, but the bitrate is different - what to do?
Profile not imported. Check both exports separately.
There is no source type - what to do?
A plug-in or system feature is missing. Install a compatible add-on or select a supported equivalent.
Microphone not working - what to do?
The new device has a different name. Select the correct input on your new computer.